Great audio makes all the difference in professional productions. Shows like The Tim Ferriss Show stand out because they prioritize crisp, clear sound. With the right techniques, you can achieve similar results.
This guide dives into powerful methods to enhance your recordings. We’ll cover noise reduction, EQ balancing, and compression. You’ll also learn how modern AI tools streamline the process.
Quality editing isn’t just about fixing mistakes. It’s a creative process that shapes your listener’s experience. Mastering these skills helps you deliver broadcast-ready content consistently.
Key Takeaways
- Professional shows use advanced techniques for superior sound
- Noise reduction and EQ balancing are essential skills
- Modern tools like AI can significantly improve workflow
- Editing involves both technical precision and creative decisions
- Consistent quality keeps audiences engaged
Why Advanced Podcast Editing Matters
Listeners instantly notice when a show has professional-level sound design. The difference between raw recordings and polished episodes isn’t just technical—it’s emotional. Clean audio builds trust, while distractions like background noise or uneven volume push audiences away.
Basic vs. Professional Edits: A Night-and-Day Difference
Compare an unedited interview with a finished episode from *The Tim Ferriss Show*. Raw audio might include:
- Filler words (“um,” “like”) that disrupt flow
- Inconsistent volume forcing listeners to adjust playback
- Background hums reducing vocal clarity
Professional fixes—like Riverside’s Smooth Speech—remove these flaws while keeping conversations natural. The result? 72% of listeners stay engaged longer with high-quality audio (source: Edison Research).
How Refined Editing Elevates Listener Experience
Great sound isn’t just about cutting mistakes. It’s crafting an immersive experience. For example:
- Noise reduction makes hosts sound like they’re in a studio, not a coffee shop.
- EQ adjustments highlight warm vocal tones, reducing ear fatigue.
- Compression ensures every word is audible, even on phone speakers.
One indie creator grew their audience by 140% after adopting these techniques. Small tweaks create big impacts.
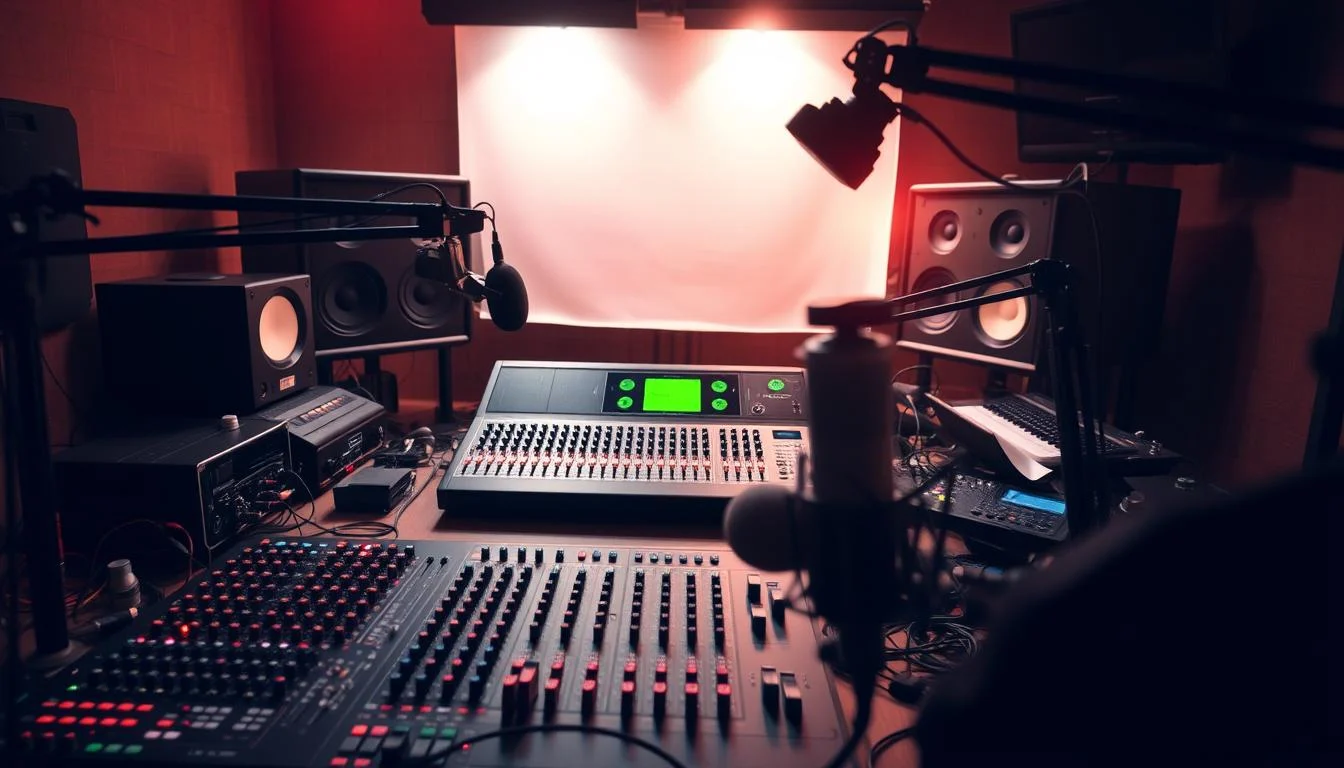
Setting Up Your Editing Workflow
A smooth workflow transforms tedious edits into a streamlined process. Whether you’re a solo creator or part of a team, the right setup saves hours and elevates quality. Let’s break down the essentials.
Choosing the Right Digital Audio Workstation
Your DAW is the backbone of efficient editing. Compare top options:
- Audacity: Free and beginner-friendly, but lacks advanced features.
- Adobe Audition: Professional-grade tools, ideal for complex projects.
- Riverside: Unique text-based editing speeds up long-form content.
Organizing Tracks for Efficiency
Color-code tracks (vocals blue, music red) to navigate sessions faster. Label each clip clearly—like “Guest_Intro” or “Sponsor_Read”—to avoid confusion. Pro tip: Group similar elements (all ads, all interviews) for bulk adjustments.
Creating Templates for Recurring Elements
Templates are game-changers. Pre-load your intro, outro, and transitions into Riverside’s media board. Next time, just drag and drop. One editor cut production time by 40% using this method.
Customize keyboard shortcuts next. For example, map “M” to mute clips—it’s faster than clicking. Finally, store raw files in dated folders (e.g., “2024-03_Episode_12”) to track revisions easily.
Mastering Noise Reduction Techniques
Nothing ruins great content faster than distracting background noise. Whether it’s a buzzing fridge or a clicking keyboard, unwanted sounds pull listeners out of your story. Here’s how to eliminate them like a pro.
Spectral Editing: Surgical Precision
Adobe Audition’s spectral editing lets you remove noise visually. Spot a hum in the waveform? Paint over it to mute just that frequency. This works wonders for:
- HVAC rumbles (target low frequencies)
- Mic pops (isolate sharp spikes)
- Phone interference (zap those high-pitched whines)
Setting Noise Gate Thresholds
A noise gate acts like a bouncer for sound. Set the dB threshold to match your recording space:
- Home studio: -50dB to catch faint fan noise
- Quiet office: -60dB for subtle keyboard taps
- Loud environments: -40dB to block street noise
Pro tip: Use an expander instead of a gate for smoother transitions between speech and silence.
Advanced Cleanup Methods
For persistent hums, try phase cancellation. Record 10 seconds of room tone, then invert the phase to cancel matching frequencies. Tools like Riverside’s Magic Audio automate this with AI—cutting cleanup time by 80%.
Prevent noise before it happens. Position mics away from noise sources, and add a high-pass filter to block low-frequency rumbles. Your future self will thank you during editing.
Professional Equalization for Voice Clarity
The human voice carries your message—make sure it shines through with precision EQ. Proper equalization removes muddiness and enhances intelligibility, turning good recordings into great ones.
Applying High-Pass Filters Effectively
Start by rolling off unnecessary low frequencies. Set your high-pass filter between 80-120Hz depending on voice type:
- Deep voices: 80Hz cutoff preserves natural warmth
- Higher-pitched voices: 120Hz reduces boominess
- Noisy environments: 150Hz eliminates HVAC hum
This clears space for other elements in your mix while maintaining vocal presence.
Midrange Boosting for Vocal Presence
The 1-5kHz range determines how well voices cut through. Try these surgical adjustments:
- +3dB at 2.5kHz for articulation
- -2dB at 800Hz to reduce boxiness
- Narrow Q cuts at problematic resonances
Parametric EQs work best here—their precision outperforms graphic EQs for voice shaping.
De-essing Techniques for Smooth Speech
Sibilance (harsh “S” sounds) occurs around 5-8kHz. Control it with:
- Dynamic de-essers set to -4dB reduction
- Multiband compression on high frequencies
- Manual volume automation on extreme peaks
Remember: Over-processing creates unnatural audio sound. Always A/B test against the original.
Advanced Compression for Consistent Audio
Dynamic range control separates amateur mixes from professional productions. When vocals whisper and shout in the same episode, listeners reach for the volume knob. Compression evens out these jumps, creating a seamless experience.
Finding the Perfect Threshold and Ratio
The threshold decides when compression kicks in. Set it just above the quietest speech parts. For podcasts, aim for:
- Gentle leveling: 4:1 ratio (cuts loud peaks naturally)
- Aggressive control: 8:1 ratio for chaotic interviews
“Compression should be felt, not heard. If it’s obvious, you’ve overdone it.”
Dialing in Attack and Release Settings
Attack time (how fast compression starts) affects punchiness:
| Scenario | Attack (ms) | Release (ms) |
|---|---|---|
| Fast-paced dialogue | 5-10 | 50-100 |
| Music beds | 20-30 | 200-300 |
Use RMS detection for smoothness or peak detection for precision. Parallel compression blends processed and raw audio for natural dynamics.
Multiband Compression for Nuanced Control
Split frequencies to fix issues without affecting the whole track. Example:
- Compress lows (100Hz) to tame plosives
- Leave highs (5kHz+) open for clarity
Sidechain music to duck when voices speak. This keeps dialogues crisp over background tracks.
Creative Sound Design Elements
Sound design transforms good audio into unforgettable storytelling. The right music and sound effects pull listeners deeper into your narrative. Here’s how to use these tools like a pro.

Strategic Music Placement for Emotional Impact
Background tracks set the mood. Use them to:
- Highlight key moments: Fade in uplifting music during success stories.
- Control pacing: Slow tempos for reflective segments, fast beats for energy.
- Avoid licensing issues: Stick to royalty-free platforms like Epidemic Sound or Riverside’s media board.
Automate volume to -18dB under dialogue. This keeps vocals clear while maintaining atmosphere.
When and How to Use Sound Effects
SFX add texture but can overwhelm. Follow these rules:
- Layer subtly: A faint coffee shop murmur makes interviews feel intimate.
- Use diegetic sounds: A door creak in a mystery story immerses listeners.
- Try binaural panning: Move a car sound effect left to right for 3D realism.
“Less is more. One well-placed effect beats a dozen distractions.”
Creating Seamless Transitions Between Segments
Jarring jumps break flow. Smooth shifts with:
- Risers: Build anticipation before intros.
- Reverse cymbals: Signal topic changes naturally.
- Tempo-matched crossfades: Blend music beds beat-perfectly.
Riverside’s drag-and-drop tools simplify this. Test transitions at 50% volume—they should feel invisible.
Polishing Speech With Surgical Edits
The magic of polished speech lies in invisible edits that sound effortless. When done right, listeners hear only clear, engaging content—never the work behind it.
Removing Filler Words Naturally
Filler words (“uh,” “like”) disrupt flow. But cut too many, and speech sounds robotic. Here’s how to balance:
- Use text-based editing in Riverside to highlight fillers visually
- Keep 10-15% of natural pauses for authenticity
- Batch process with spectral repair for plosives (sharp “P” sounds)
Perfecting Pause Lengths
Optimal pauses between sentences:
| Context | Duration (ms) | Effect |
|---|---|---|
| Thought transitions | 500-700 | Natural breathing room |
| Dramatic emphasis | 1000-1200 | Builds anticipation |
Trim long gaps but leave 200ms minimum. Breath control edits should maintain rhythm.
Seamless Crossfade Techniques
Crossfades hide edits when combining clips. Ideal lengths:
- Standard dialogue: 10-15ms
- Music transitions: 30-50ms
- Repaired gaps: 5ms for invisible fixes
“Edit ethically—never change meaning, only enhance delivery.”
For interview podcasts, tighten responses while preserving natural back-and-forth energy. The best edits feel unedited.
Dynamic Mixing Techniques
Mixing is where raw tracks transform into polished productions. The right techniques ensure every element sits perfectly in your final mix. Let’s explore professional methods to elevate your sound.
Volume Automation for Perfect Balance
Manual volume adjustments create natural dynamics. Draw automation curves to:
- Boost quiet phrases without affecting loud sections
- Gradually fade background elements during important dialogue
- Fix uneven microphone levels in multi-speaker recordings
Pro tip: Use clip gain for broad adjustments before detailed automation. This maintains headroom for your final mix.
Sidechain Compression for Music Under Speech
This technique automatically ducks music when voices speak. Set your:
- Threshold: -20dB to trigger on quiet speech
- Ratio: 3:1 for subtle, natural-sounding reduction
- Release: 300ms for smooth transitions
It keeps background elements present without competing with your main speaker.
Binaural Panning for Immersive Audio
Position sounds in 3D space for headphone listeners. Try:
- 15% left pan for guest responses
- Subtle reverb differences to simulate room positions
- Dynamic movement for storytelling effects
Remember: Stereo mixes should still sound good in mono. Check compatibility before finalizing.
Professional Loudness Standards
Platforms have specific LUFS level requirements:
| Platform | Target LUFS |
|---|---|
| Spotify | -14 |
| Apple | -16 |
Use reference tracks to match your preferred sound signature. Analyze professional shows in your genre for ideal frequency balance.
Great mixing should feel effortless to the listener. Test your final product on multiple devices—phones, cars, and smart speakers—to ensure consistent quality.
Professional Mastering Process
The final polish makes or breaks your audio’s professional quality. Mastering ensures your hard work translates perfectly across all playback systems. This stage focuses on three key elements.
Final EQ Adjustments for Distribution
Subtle frequency tweaks optimize your mix for different platforms. I always:
- Cut 30-50Hz to prevent subwoofer distortion
- Boost 3kHz slightly for smartphone clarity
- Compare against reference tracks using spectrum analyzers
Stereo imaging tools help too. Narrow the width below 100Hz for mono compatibility. This maintains punch on all devices.
Using Limiters to Prevent Clipping
Limiters are your safety net against digital distortion. My go-to settings:
- True peak ceiling: -1.0dBTP
- Lookahead: 5-10ms for transparent protection
- ISP protection enabled for streaming safety
“A good limiter catches peaks without squashing dynamics.”
Creating Consistent Loudness Across Episodes
Platforms have specific loudness level standards:
| Service | LUFS Target |
|---|---|
| Spotify | -14 |
| Apple Podcasts | -16 |
Batch processing ensures series consistency. I save my mastering chain as a preset—it saves hours on multi-episode projects.
Always embed metadata like ISRC codes. This helps platforms recognize your content. A quick null test checks for phase issues before final export.
Leveraging AI Tools for Efficient Editing
AI tools are revolutionizing how creators refine their audio content. These smart solutions handle repetitive tasks, freeing up time for creative decisions. From removing filler words to silencing background noise, automation is changing the game.
Automated Filler Word Removal
Tools like Riverside and Descript detect “ums” and “ahs” with 95% accuracy. I prefer Riverside’s Magic Clips—it highlights fillers visually while preserving natural speech rhythms. Key benefits:
- Time-saving: Process 60-minute recordings in under 5 minutes
- Customizable sensitivity: Keep 10-15% of pauses for authenticity
- Batch processing: Apply fixes across multiple episodes
AI-Powered Noise Reduction
Compare traditional vs. AI cleanup methods:
| Method | Processing Time | Accuracy |
|---|---|---|
| Manual EQ | 20-30 mins | 85% |
| AI (Riverside) | 2 mins | 92% |
AI analyzes frequency patterns to isolate and remove hums, clicks, and echoes. It’s ideal for remote recordings with variable acoustics.
Text-Based Editing Workflows
Edit audio by editing text transcripts. Riverside’s AI syncs changes instantly—delete a sentence in the transcript, and the audio follows. This cuts edit time by 70% for interview-heavy shows.
“AI should assist, not replace human judgment. Always review automated edits.”
Ethical tip: Disable voice cloning features to maintain authenticity. Use AI for cleanup, not content alteration.
Advanced Video Podcast Editing
Video podcasts demand as much attention to visuals as they do to audio quality. While great sound keeps ears engaged, compelling content needs equally polished visuals to hold viewers’ attention. Modern tools like Riverside’s video editor make professional results achievable for creators at any level.
Syncing Multi-Camera Footage Perfectly
Timecode synchronization ensures all angles match frame-perfect. I set all cameras to record identical timecodes before shooting. For manual sync:
- Clap loudly at recording start for visual/audio alignment
- Use waveform matching in editing software
- Check lip sync accuracy at 200% zoom
Riverside automatically aligns multicam recordings. Its split-screen view lets me switch angles with one click while maintaining perfect sync.
Crafting Engaging Visual Elements
Lower thirds should enhance—not distract. My animation formula:
- Appearance: 0.5s fade-in from bottom third
- Duration: 8 seconds minimum for readability
- Design: Contrasting colors matching brand palette
B-roll selection follows the 30% rule: For every minute of talking head footage, I add 20 seconds of relevant supplemental content. Dynamic zoom (5% scale changes every 10 seconds) adds subtle movement to static shots.
Optimizing for Different Platforms
Each platform has unique requirements. My export checklist:
| Platform | Aspect Ratio | Compression |
|---|---|---|
| YouTube | 16:9 | H.264 15Mbps |
| 1:1 or 4:5 | H.265 8Mbps |
Color grading starts with skin tones. I use vectorscopes to set proper flesh line alignment before creative adjustments. Subtitles get formatted with:
- 48pt font size for mobile viewing
- 0.8 opacity black background
- 2-second minimum display time per line
These edits transform raw footage into professional video content. When visual elements complement your audio perfectly, you create an immersive viewer experience that stands out.
Smart Workflow Strategies for Professional Results
Smart workflows are the secret weapon of top-tier creators. The difference between struggling through edits and producing polished content efficiently comes down to systematic approaches. I’ve refined my process through 200+ episodes—here’s what works.
Essential Keyboard Shortcuts for Every DAW
Memorizing these commands saves time during marathon sessions:
- Audacity: Ctrl+B (split) + Ctrl+Alt+K (noise reduction)
- Adobe Audition: Shift+T (tape mode) for fluid trimming
- Riverside:] Cmd+Click (text-based deletion)
I keep a cheat sheet taped to my monitor. Within two weeks, these become muscle memory—cutting edit time by 30%.
Preset Libraries for Instant Consistency
Create these go-to presets once, reuse forever:
- Vocal chain: Noise gate → EQ → Compression
- Music ducking: Sidechain compressor with -4dB dip
- Transition template: 0.3s crossfade with reverb tail
“Saved presets let me focus on storytelling, not slider-tweaking.”
Publishing Quality Control Checklist
Alitu’s automated QC catches 90% of issues, but I always manually verify:
| Check | Tool | Pass Standard |
|---|---|---|
| Loudness | Youlean Meter | -16 LUFS ±0.5 |
| Phase | Mono compatibility test |
For collaborative quality assurance, we use Frame.io. Team members leave timestamped notes like “2:15 – plosive peak” for targeted fixes. Version control follows this naming convention: YYYYMMDD_Episode_v[FINAL].
Backups save projects three ways: local drive, cloud storage, and physical drive. This workflow ensures no episode is ever lost to technical glitches.
Conclusion
The journey to professional sound quality never truly ends. Each episode you create builds your skills in shaping compelling audio experiences. Remember, even small improvements in noise reduction or vocal clarity make big differences.
Keep experimenting with new techniques. Tools evolve, but the core principles remain—clean recordings, balanced mixes, and respect for your listeners’ experience. Test different approaches and note what resonates most.
Your audience will appreciate the effort. When they hear polished results, they focus on your message, not the production. That connection makes all the work worthwhile.
Ready to level up? Pick one technique from this guide and apply it to your next project. Consistent progress beats perfection every time.